 I love that book. Peter Pan, that is. I have yet to figure out what it has to do with the popular collar style. Except both rock. So... I decided to see what I could do with mixing a collar style with jewelry. I came up with two styles (so far), and I'll share my how to with you.
I apologize for the blurriness of these photos. I'm learning how to take pictures of myself that avoid my un-made-up face, and deal with unnatural light, and, well, a host of other problems I have with cameras.
Here's how I made the first:
Supplies:
- Chain (mine was from a tangled mass of junk jewelry I bought at a vintage market)
- Jump rings
- chain clasp
- beads
- jewelry wire (pic to follow, 'cause I don't know what it's called)
- clamper beads (for the jewelry wire)
- pliers
- rough neck measurement
Step two: Roughly eyeball how much wire you need for a desirable shape and length. Cut two lengths of it.
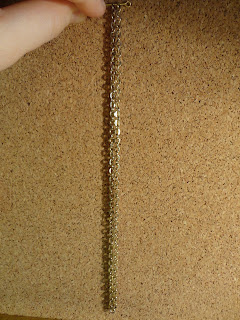
Step three: figure out the middle point of your chain. My method: I drop the chain, and find the middle link. If there isn't, I remove one link. Then I mark it with something.
Step four: this stuff (repeat for both halves of necklace):
Step five:
Trial and error. It took me forever to find a pattern with my beads that met my supply (only have so many beads in this world), and looked nice. You can see my choice in the final outcome pictures.
Step six: fasten and add your clasp on the same final link of the chain.
Step seven: think, "this is pretty cute, I could wear it just like this!" and proceed to wear it to the family's New Year Hop-n-John dinner.
Then, because you're just curious about what else you can do with it, you might measure out lengths of chain to fill in the gap between the beads and original chain. I thought this might create more of the collar feel.
Measure where you want your cross chains to start, and mark:
Let me point out here that this "neck simulator" in the photo is a life saver for these last steps. You just can't get the feel for how this will look if your necklace is laid out flat. Trust me. I screwed this up for over an hour before figuring out the problem. I make mine out of cardboard and an old Goodwill shirt, based off my neck size. Not perfect, and it confuses the hell out of your camera (wasn't thinking about tutorials when I designed it), but it helps!
This makes my longest jewelry project. Trial and error defines this whole process. It's a huge step forward in my life that I can allow myself the pleasure of exploring possibilities. Like Anne Lamott says, you have to allow yourself a shitty first draft. Good ideas are born hazy, and evolve into good outcomes.
See? I can't relieve myself of the urge to philosophize, even when creating.
More photos:
Tell me how you make it work for you.
chesha
I'll be linking to these sites:
Monday:
Tuesday:
Wednesday:
Thursday:
Friday
Sunday:


what a neat idea! i love the look of peter pan collars, and this is a totally different way to incorporate the look. great job!
ReplyDeleteThanks so much! I'm experimenting with different outfits to style it with now.
ReplyDeleteI took a look at your blog, and... I LOVE YOUR HOUSE!! Seriously. Looks so cozy and full of character.
Love how this turned out. I love this type of necklaces.!
ReplyDeleteThanks Christine!
DeleteSo lovely!!!Brilliant ieda love the colors too! Thanks so much for sharing the great tutorial! I'd love for you to visit my blog.
ReplyDeleteHave a great Year!
Hugs from Portugal,
Ana Love Craft
www.lovecraft2012.blogspot.com
Ana, you have so many great crafts. My favorites so far: your pink and black lace clutch, and the calendar covers. Glad you like my Peter Pan necklace. Thanks for stopping by!
Delete